As described in the page for the structure of the whole project, the Running Shed is being built in seven phases. The first three phases were all concerned with preparation for the actual construction work, phase 4 was the construction of the foundations and the installation of the oil separator, and phase 5 was the erection of both the framework of the building, and the roof for it.
This was completed about a week before the end of July, and it had been expected that this phase would then follow on immediately with the installation of the cladding sheets for the walls. This in turn would be followed by us laying large numbers of bricks. After discussion with the contractors, however, it was agreed that a better sequence would be for us to start on laying the bricks, but before that there were one or two other minor jobs that needed to be done.
In particular, it was planned that the internal floor of the building on either side of the pit would eventually be stone ballast, and it would obviously be easier to get this into place before the brickwork was laid. Before that could be done, however, the spoil from constructing the foundations that was still inside the building needed to be moved out, using picks and shovels to excavate it, and then wheelbarrows and our JCB to move it away.
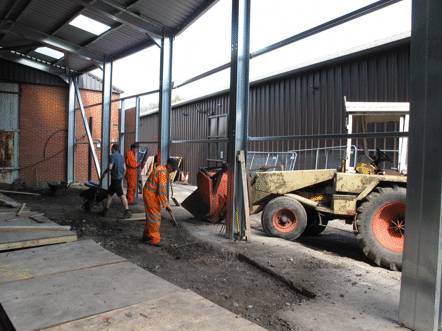
Removing spoil from the floor of the running shed, to make space for the ballast.
Picture © Tony Cowling, 2016.
Once this had been done, brick laying could start, and the picture below was taken on Saturday 20th August.
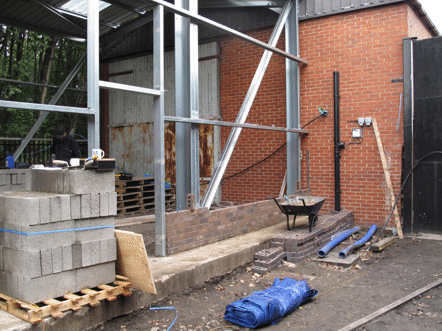
The first half-a-dozen courses of bricks have been laid.
Picture © Tony Cowling, 2016.
By the Sunday afternoon good progress was being made on this section of the wall, as shown in the picture below. The bricklayer is a professional who had volunteered to help, which is why the bricks are being laid far better and far more quickly than our amateur efforts could have achieved.
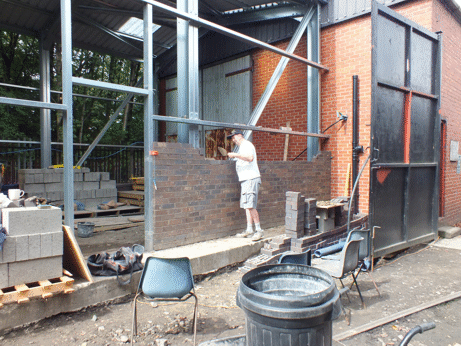
Bricklaying in progress.
Picture © Andrew Johnson, 2016.
The bricks had been stored in two of the open wagons, and were having to be unloaded: in the picture below this was from our 12-ton Middleton Colliery wagon. Also the blocks that form the inner skin of the walls had been delivered to the car park, and were having to be moved up into position in batches, ready to be used.
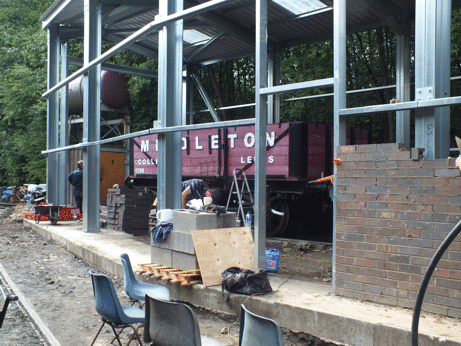
Bricks and blocks being unloaded and moved into position.
Picture © Andrew Johnson, 2016.
By the end of Sunday this section of the brickwork was almost complete, as shown in the picture below.
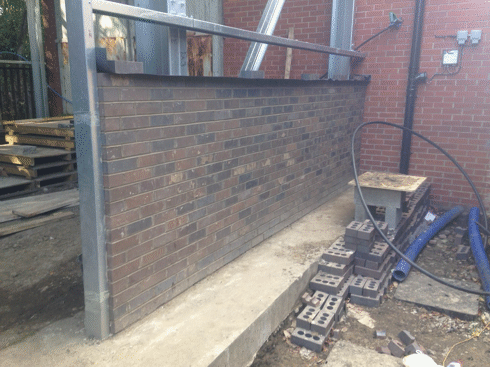
One section of the brickwork almost complete.
Picture © Mark Calvert, 2016.
A break was taken over the August Bank Holiday weekend, but the following weekend bricklaying continued on the west wall of the running shed, despite the weather. This required some shelter to be improvised, using a tarpaulin and some of the wooden covers that had been made for sections of the pit, and in the picture below the bricklayers can just be seen inside the shelter.
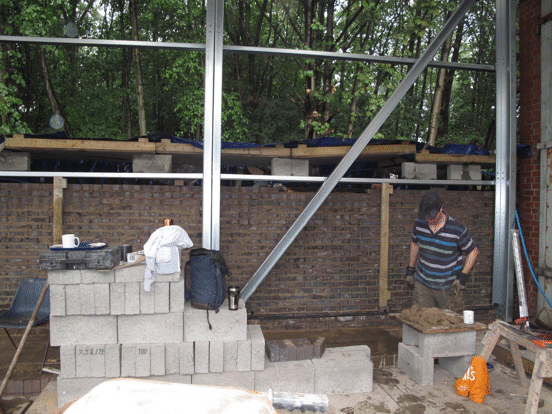
Two panels of the brickwork for the west wall of the running shed almost complete. Inside the shed mortar is being mixed for the blockwork for the inner skin of the wall.
Picture © Tony Cowling, 2016.
Here is a better view of the bricklayers at work: not ideal conditions!
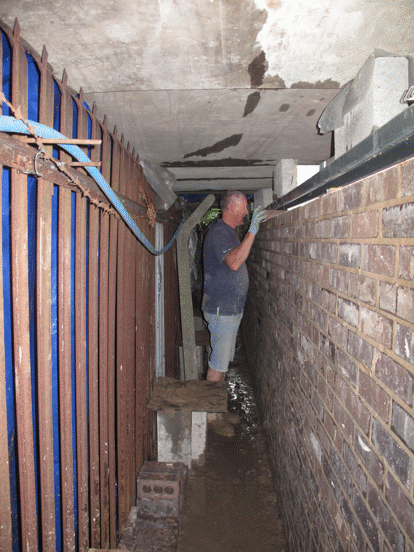
On the left is the boundary fence, with the wooden covers resting on top of it, and the tarpaulin outside it. On the right is the brickwork for the west wall, almost up to the height of the sheeting rail.
Picture © Tony Cowling, 2016.
Meanwhile, more bricks were being unloaded from where they had been stored in the 13-ton mineral wagon, ready to be laid for the two southern panels of wall.
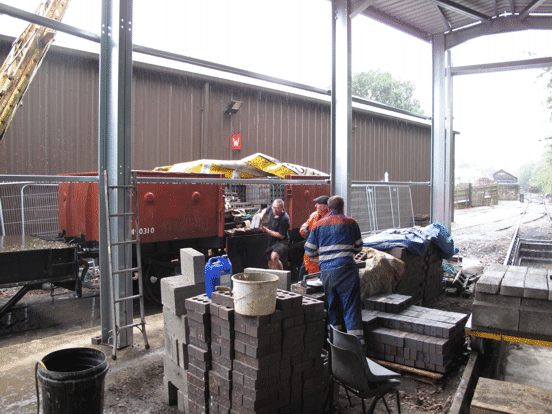
At the left-hand side of the picture is a water barrel, for mixing mortar, and then a pile of blocks for the inner skin of the walls. In the centre are the piles of bricks that are being unloaded from the wagon. To the right, over the pit, is the four-wheeled trolley that had been used to bring the next batch of blocks up from the car park.
Picture © Tony Cowling, 2016.
By the end of September the brickwork for the western wall was just about complete, and work was well underway on laying the blocks for the inner skin of this wall. The picture below shows this blockwork near to completion in mid-October. The section above the diagonal bracing will be filled in with lightweight foam blocks, so as not to put too much loading on this part of the frame.
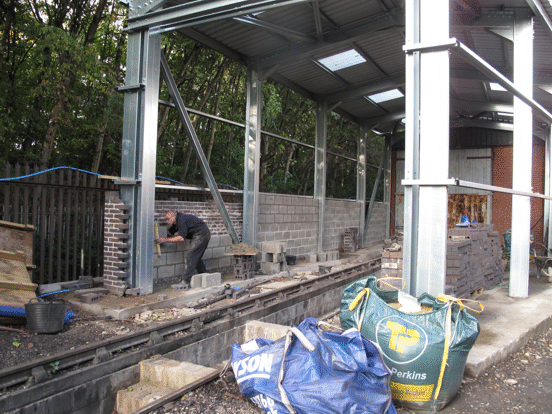
The southern panel of blocks for the western wall being completed by one of our volunteers, who is checking to make sure it really is vertical.
Picture © Tony Cowling, 2016.
By the end of October this section of blockwork had been completed, and also the north-east section of wall had been completed: the picture below shows it with just the last course of brickwork about to be laid, while our volunteers had gone for a well-earned cup of tea. When they had laid this course there would still be a gap between the top of the brickwork and the sheeting rail, but this was intentional, as the sheeting extends down a little way below the bottom of the rail, and then there is flashing below it to fill in the gap. By contrast the inner blockwork does go right up to the level of the sheeting rail, as can be seen in the picture above.
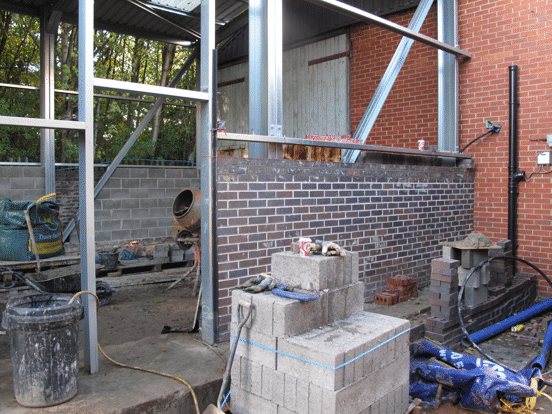
The north-eastern panel of bricks just about complete.
Picture © Tony Cowling, 2016.
This meant that we just had the south-eastern section of the wall to build, but this was going to be the trickiest part, because it would incorporate all the engraved bricks that had been paid for through the "Buy a Brick" appeal. They had been engraved and were stacked in the Engine House, ready and waiting, as shown in the picture below. They had been carefully organised into rows to match the plan for where each one would go in the wall.
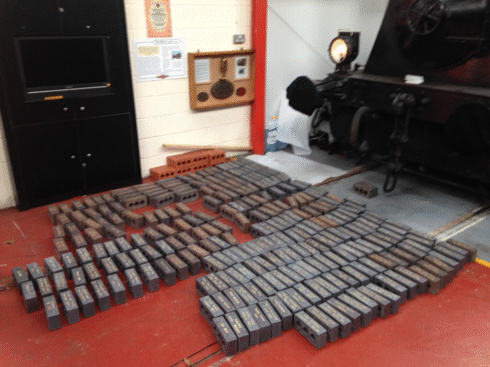
The engraved bricks laid out on the floor of the Engine House, in rows to match the plan for where each name would go.
Picture © Mark Calvert, 2016.
To make sure that they were laid properly we would definitely need real bricklayers. Fortunately, in mid-November another of the professional bricklayers who had offered to help us was able to spend a day on the job, and the picture below shows him finishing off the south-west corner of the brickwork, so that it lines up properly with the upright that will carry the door frame.
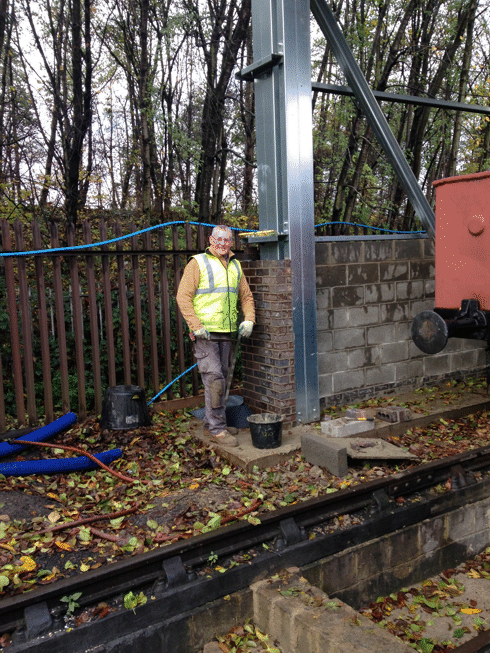
The south-western corner of the brickwork being finished off.
Picture © Mark Calvert, 2016.
Attention then turned to the south-eastern section of wall, where the first step was to lay six courses of plain brickwork. Then the courses of engraved bricks could be laid above those, according to the precise plan that had been worked out for which bricks would go where. Our chairman was invited to lay the first of these engraved bricks, as in the picture below.
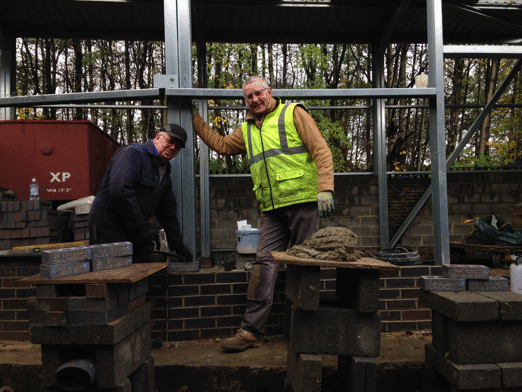
Malcolm laying the first of the engraved bricks.
Picture © Mark Calvert, 2016.
As well as laying bricks, one other job which needed to be done at about this stage was to fill in the space between the two pits, once the drainage pipes which connect them had been laid in place. Since our cement mixer is only quite small, this involved mixing a number of loads of rough concrete, and the picture below shows one of the last of these being poured into place.
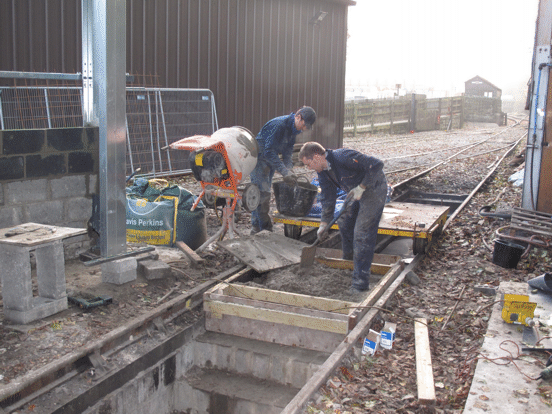
Concrete being poured for the wall separating the internal and external pits. The wooden shuttering is needed to ensure that, when the concrete has set, there will be an adequate flangeway for the track into the shed.
Picture © Tony Cowling, 2016.
Once all of the concrete had been poured it forms the floor of the doorway for the track into the shed, as illustrated in the picture below, which shows it having been levelled off in the wooden shuttering.
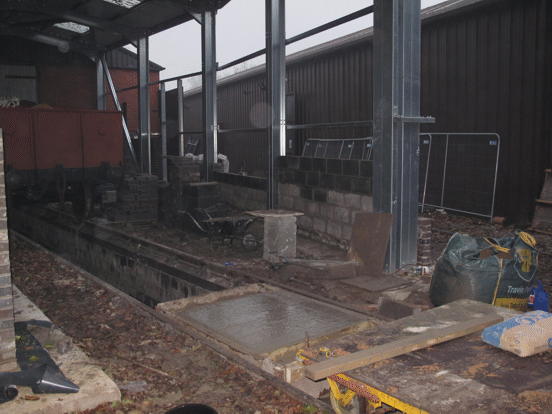
The completed concrete for the wall separating the internal and external pits, taken from the outside of the building. It now looks like the floor of a doorway.
Picture © Tony Cowling, 2016.
With this done there was just the last stage of the bricklaying to finish, which involved laying all of the engraved bricks in their planned positions and then finishing off the courses above them. This happened on the first Saturday in December, and the picture below shows the bricks all laid, and being pointed.
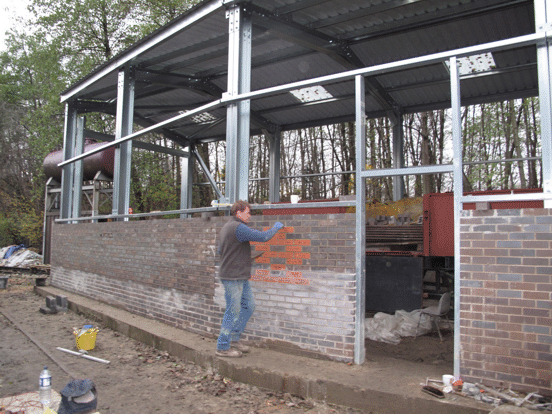
Another of the professional bricklayers who had offered to help us, pointing the engraved bricks in the south east wall. The bright red bricks are the ones engraved with the names of the players in the Hunslet Rugby League Team who played in the 1965 Challenge Cup Final against Wigan at Wembley.
Picture © Tony Cowling, 2016.
While the professional bricklayer was building the outer skin of the wall, our amateurs were laying the blockwork for the inner skin of it, as shown in the picture below.
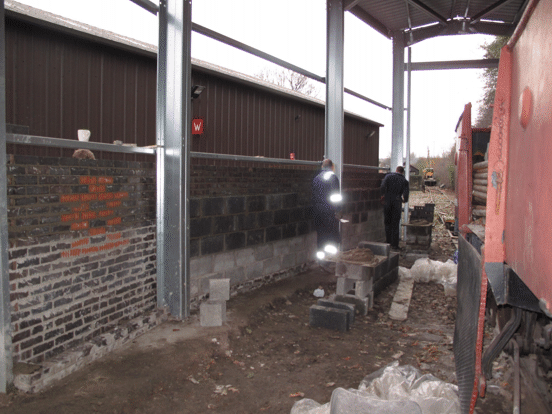
Two of our volunteers laying the blockwork for the inner skin of the south east wall. The light was sufficiently poor to need flash, which has produced these curious reflections from hi-viz patches on overalls.
Picture © Tony Cowling, 2016.
The completion of this section of brickwork meant that everything was now ready for the rest of the wall cladding sheets to be fitted. This was done by the contractors in the last few days of December, but nobody seems to have been around with a camera to record it, and by the time we turned up on the following weekend the cladding was complete, as shown in the picture below.
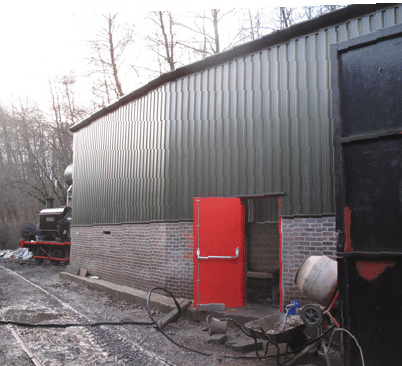
The shed with the cladding complete and the personnel door installed. The pit is already in use for washing out the boiler of "Sir Berkeley".
Picture © Tony Cowling, 2017.
This effectively completed phase 6, although we still had to install the main doors at the south end of the shed. But that marked the start of the process of fitting out the shed, which was the final phase of the construction work.
Go on to the next stage in this project.
Go back to the previous stage in this project.
Return to the overall description of this project.
More Information
Other pages about this project and the "Buy a Brick" appeal:
- An overview of the project and the appeal;
- The "Buy a Brick" appeal;
- The structure of the project;
- The progress with the project;
- The construction of the pit;
- Design and site preparation;
- Construction of the foundations;
- Erection of the Framework;
- Fitting out;
- The opening ceremony.
Other pages provide more information about:

