As described in the page for the structure of the whole project, the Running Shed is being built in seven phases. The first three phases were all concerned with preparation for the actual construction work, and after various delays this work finally commenced on 31st May 2016 - at 6.00am, no less!
The first step was to bring the necessary plant onto site, and the picture below shows Midbrook Steel's dumper track running up through what is normally our security compound, closely followed by their excavator. The dumper truck is carrying a load of metal fencing panels that were used to make the construction site secure.

Construction plant arriving on site.
Picture © Mark Calvert, 2016. Taken at 6.10 in the morning on the first day of construction work!
Once established on site the contractors wasted no time, but of course for constructing foundations you have to start by digging down before you can build up. So, the first step was for the excavator to start digging the trenches for the foundations on the east side of the running shed, and by mid morning good progress was being made, as shown in the picture below.
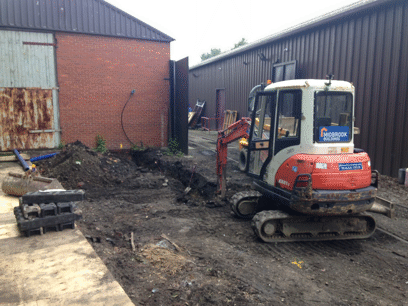
Midbrook Steel's excavator digging out the foundation trench for the east wall of the running shed. Note the covered pit on the left-hand side of the picture.
Picture © Mark Calvert, 2016.
By the end of Tuesday the trench was complete, but it needed to be checked by the building inspector. He came on Wednesday, and gave permission for the concrete to be poured, so later that day three lorry loads of it were delivered. Then a fourth lorry load was needed on Thursday morning (2nd June), to finish off the foundations for this side of the shed, and the picture below shows this fourth load being poured.
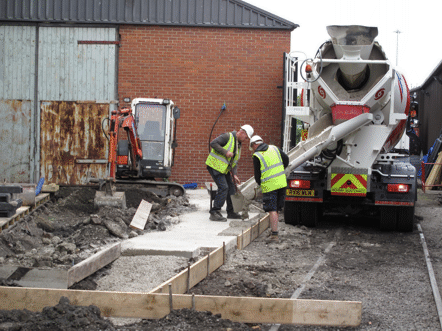
Concrete being poured for the east side foundations.
Picture © Tony Cowling, 2016.
Once this load of concrete had been poured, and then the top smoothed off, attention switched to the west side. The picture below shows the trench for this side being dug, on the Thursday afternoon.
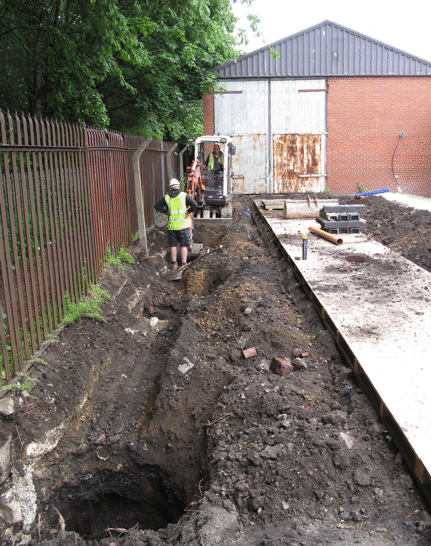
Excavating the foundation trench for the west side of the running shed.
The first two of the deep parts of the trench are clearly visible, and the excavator is working on the third. These deep parts are for the portions of the concrete that will support the uprights of steel frame.
Picture © Tony Cowling, 2016.
By Tuesday of the following week this trench had been completed, the building inspector had checked it and given permission to proceed, and the concrete had been poured. The picture below shows it with the shuttering still in place, but once the concrete had set to the point where the shuttering could be removed then the foundations were complete.

The foundations for the west side of the running shed, after the concrete had been poured but with the shuttering still in place. The blue pipe that feeds the water tower can be seen suspended from the fence posts, to ensure that it did not get buried in the foundations.
Picture © Mark Calvert, 2016.
As soon as the work on the foundations had reached a stage where the pit could be used, then it was, as shown in the picture below. This was taken during the model railway exhibition, where "Driver for a Fiver" was being operated, which is why there is a yellow flag and a red flag visible between the rails of the track on the right of the picture, to mark the limits of the operation.
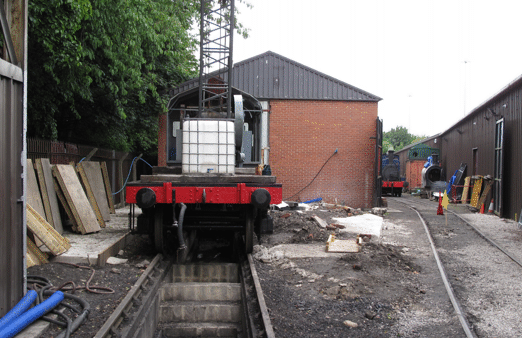
The crane and the ex-Hunslet flat wagon (with a large water carrier on top of it) standing inside the area of the running shed, with the completed foundations visible on both sides.
Picture © Tony Cowling, 2016.
The next step was to install the oil separator, which was done between 13th and 15th July 2016, fitting round the preparations for our Victorian Gala on 16th and 17th July. The oil separator is a large unit, as shown in the picture below, where it is on the ground in the security compound, waiting for the hole to be dug for it.
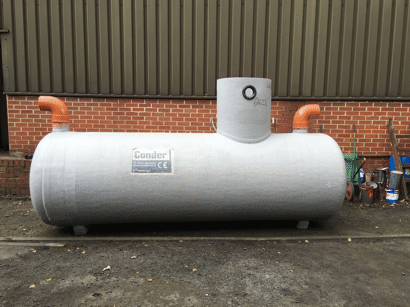
The oil separator, waiting to be installed.
Picture © Janet Auckland, 2016.
Meanwhile, Drainstore (who had supplied the separator) were excavating the hole for it, as shown in the picture below. Eventually the hole would be nearly 3 metres (9 feet) deep.
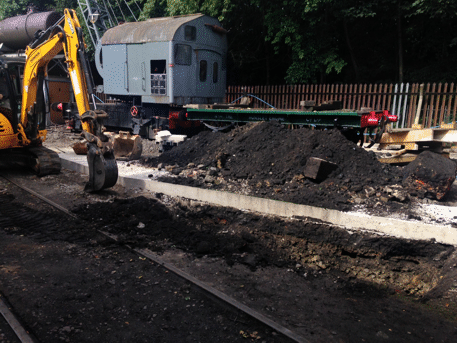
Excavating the hole for the oil separator, between the foundations of the running shed and the track into the security compound.
Picture © Mark Calvert, 2016.
Once the hole had been excavated, then dry concrete needed to be laid into the bottom of it, for the separator to sit on, and the picture below shows the dry concrete being delivered. Once the bottom layer had been laid, then the separator could be lowered into the hole, as shown in the picture below that, and more dry concrete tipped round it to hold it in place.
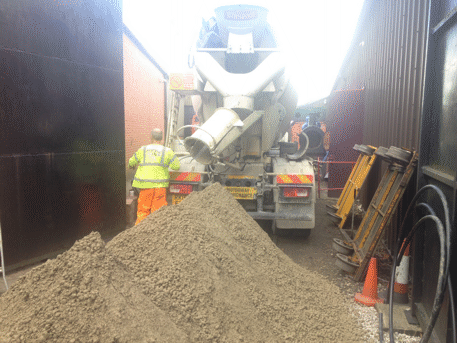
The dry concrete being delivered.
Picture © Mark Calvert, 2016.
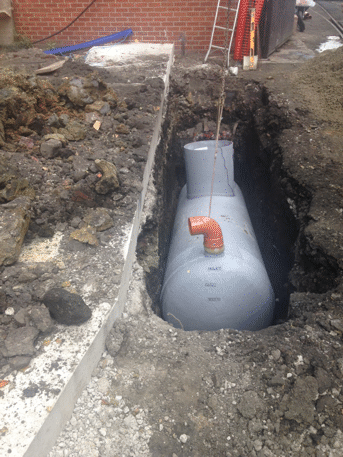
Lowering the oil separator into the hole.
Picture © Mark Calvert, 2016.
Once the oil separator was securely in place, then the inlet pipe from the pit and the outlet pipe to the drain could be connected up, and the chambers for the pump and outlet constructed on top of it. The manhole covers for these were then fitted, and in the picture below they are all that can be seen of the separator.
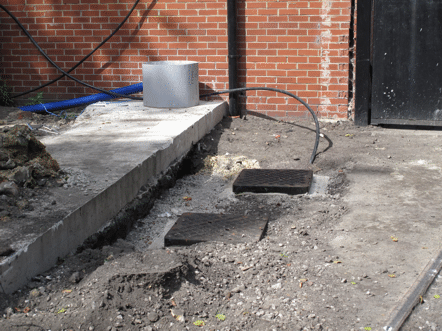
The oil separator installed, with just the manholes visible.
Picture © Tony Cowling, 2016.
This completed the construction of the foundations, and once the spoil had been cleared everything was ready for erection of the framework to start.
Go on to the next stage in this project.
Go back to the previous stage in this project.
Return to the overall description of this project.
More Information
Other pages about this project and the "Buy a Brick" appeal:
- An overview of the project and the appeal;
- The "Buy a Brick" appeal;
- The structure of the project;
- The progress with the project;
- The construction of the pit;
- Design and site preparation;
- Erection of the framework;
- Construction of the walls;
- Fitting out;
- The opening ceremony.
Other pages provide more information about:

