As described in the page for the structure of the whole project, the Running Shed is being built in seven phases. The first three phases were all concerned with preparation for the construction work, and phases 4 to 6 were concerned with the actual construction of the building. Phase 6 was completed just at the end of 2016, and then this last phase covers fitting out the building to make it usable.
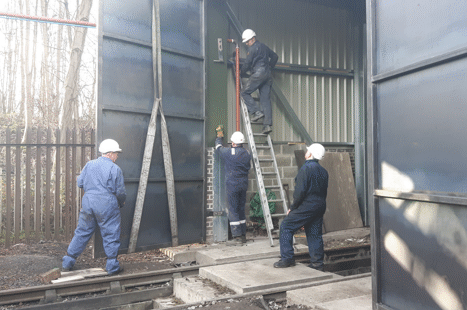
A key step in this was to make the building secure, by constructing and fitting doors to the south end of the shed, but even while preparations were being made for this there were various bits of work that could be undertaken. One of the first of these, which was done early in January 2017, was to prepare for creating the doorway through into the old workshop, by installing a lintel to support the brickwork above it, as shown in the two pictures below.
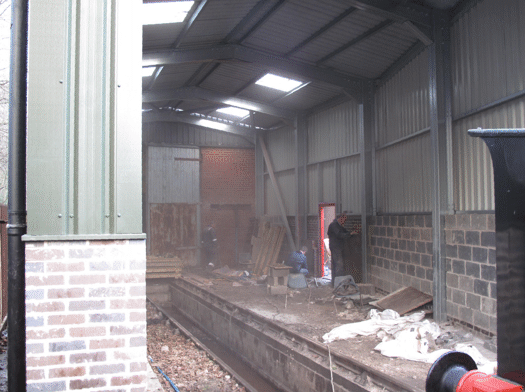
A view into the running shed, showing where a slot is being cut into the brickwork for the lintel.
Picture © Tony Cowling, 2017.
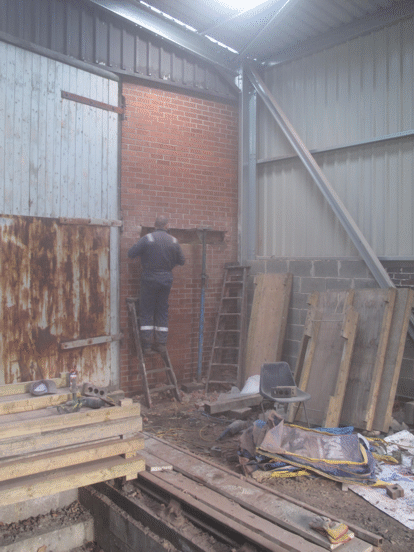
One of our volunteers cutting the slot in the brickwork for the lintel.
Picture © Tony Cowling, 2017.
Several weeks later, early in February, the lintel had been installed, as shown in the picture below. Also part of the water treatment plant had been positioned (the two blue objects alongside the east wall), but not yet plumbed in, and the electrical conduits and distribution board case had been mounted on the wall.
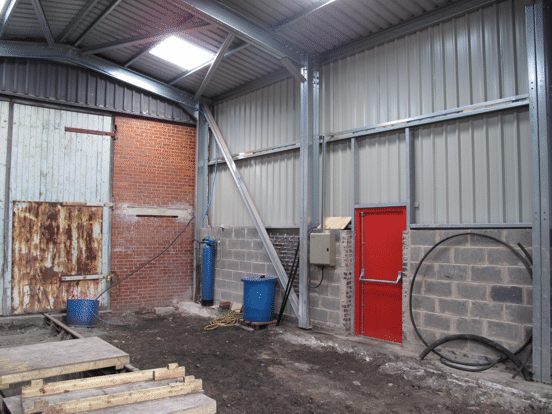
The lintel for the doorway into the old workshop in place.
Picture © Tony Cowling, 2017.
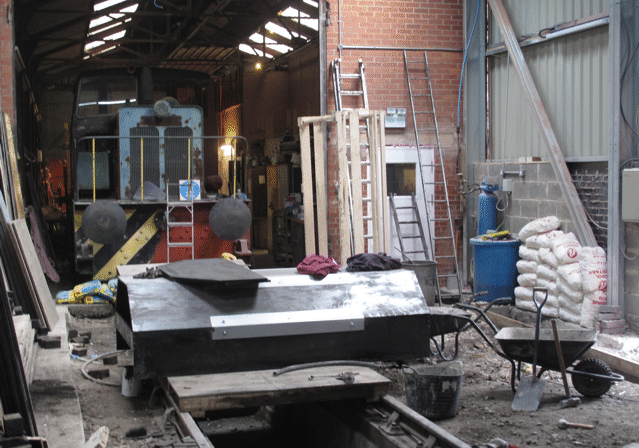
One piece of work that needed to be done to prepare for installing the doors was to construct the two parts of the doorstep that go either side of the track, and the picture below shows them being finished off.
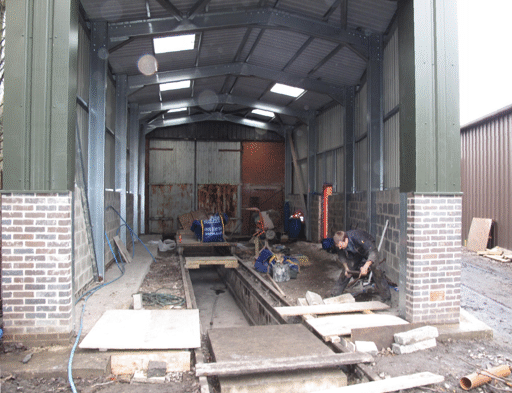
The two sections of doorstep either side of the track being finished off. They have been covered with boards to stop people treading on them until the concrete had cured.
Picture © Tony Cowling, 2017.
Also some preliminary work was being done on the floor. Originally it had been proposed that this would be ballast, but we had been given a large quantity of wooden blocks that had originally formed the floor of the machine shop at the premises of Braime Pressings Ltd, and had been recovered from this building when it had been cleared to make space for the University Technical College. It was clear that these blocks would form a much better floor, and the picture below shows some of them stacked up against the wall of the building, waiting to be cleaned.
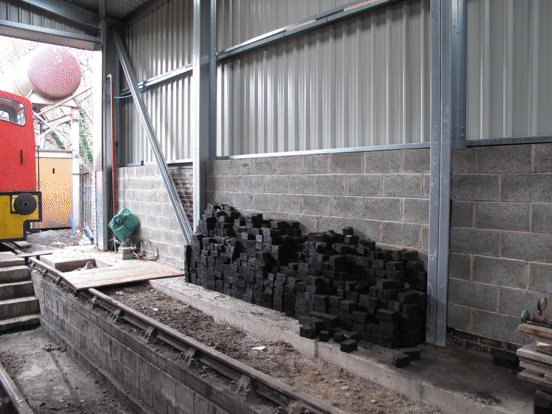
Some of the wooden blocks for the floor, stacked up against the west wall of the shed, ready for rough cleaning.
Picture © Tony Cowling, 2017.
Meanwhile, there had been some discussion about whether the main door should be a roller shutter, as originally intended, or a pair of conventional hinged doors like the others in the workshop. The conclusion of this was that fitting hinged doors would actually give additional space inside the building. The doors had therefore been designed, and in the workshop the first of them was being constructed, as shown below.
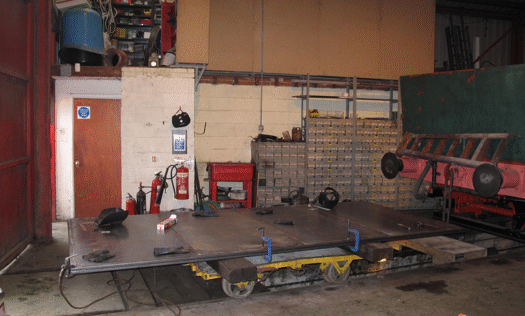
A door under construction in the workshop, mounted on a four-wheel trolley.
Picture © Tony Cowling, 2017.
Here the frame of the door had been welded up, and the picture below shows a section of sheeting being welded onto the frame.
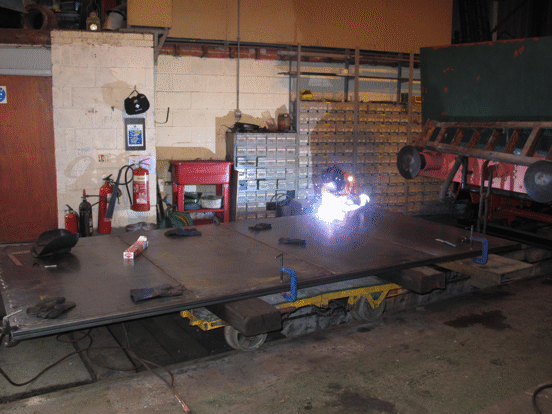
Welding in progress: the locomotive to the right is "Brookes No. 1".
Picture © Tony Cowling, 2017.
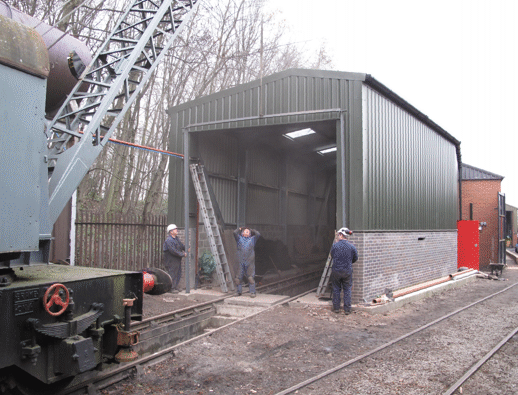
Once both doors had been made then they were fitted into place, and this was done early in March. The picture below shows the second one being lifted by the crane while the hinge fittings were attached to the frame of the building.
Lifting the second door into place: the hinges for the first door have already been attached to the frame of the building.
Picture © Richard Pike, 2017.
The picture below then shows the the two doors from the inside of the building. Unfortunately, it is apparent from this picture that actually they did not close properly.
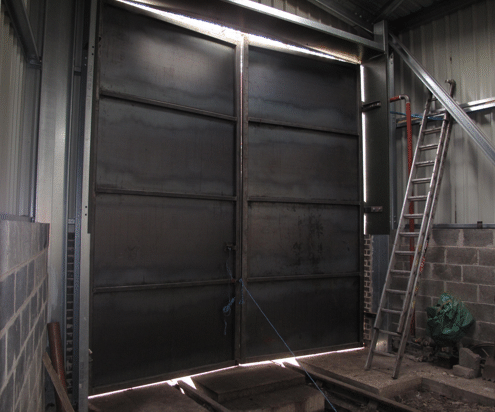
The two doors in place, fastened temporarily by a piece of rope.
Picture © Tony Cowling, 2017.
The reason for this problem with closing the doors turned out to be that the frame of the building (which had been designed on the assumption that a roller shutter door would be fitted) was actually flexing under the weight of the doors. A different method of supporting their weight was therefore needed, and so an external door frame was designed and fabricated, and by mid-March could be fitted to the end of the building. The picture below shows this frame being lifted into place.
The external door frame being positioned, prior to attaching it to the building.
Picture © Tony Cowling, 2017.
Once this frame had been positioned precisely and attached firmly to the building, then the doors could be hung on it, and the picture below shows the two doors finally in place.
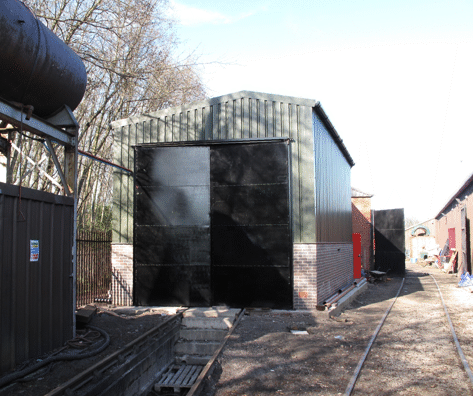
The two doors mounted on their external door frame, and closed securely.
Picture © Tony Cowling, 2017.
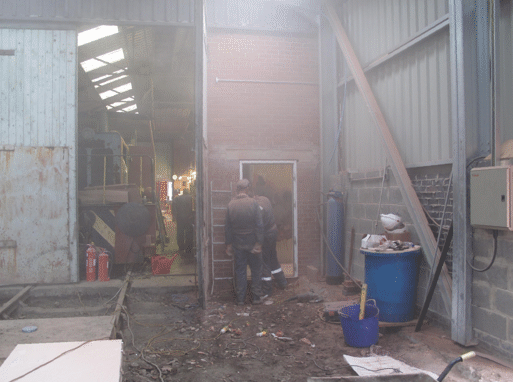
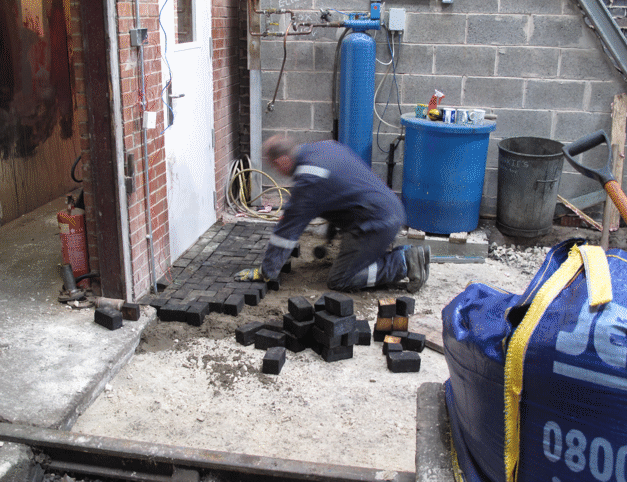
Meanwhile, even with the external doors as originally installed the building was secure enough that the doorway into the old workshop could be knocked through, and the picture below shows this being done.
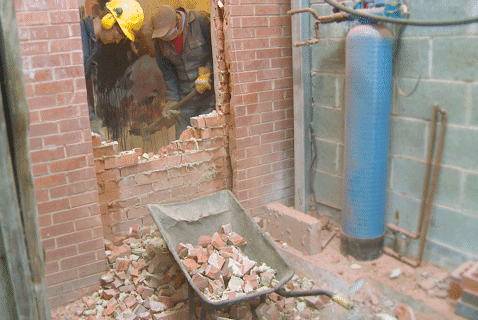
Knocking through the doorway into the old workshop. One skin of bricks has already been taken out, and the second is being removed.
Picture © Gavin Johnson, 2017.
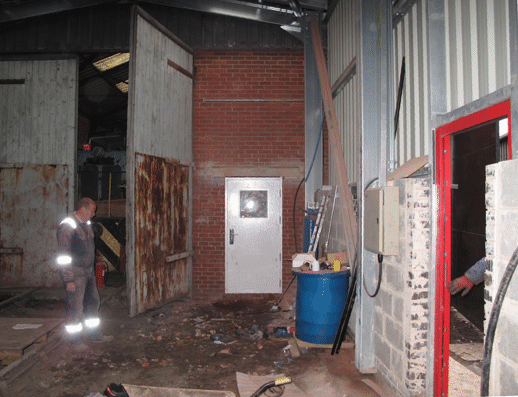
Once all of the bricks had been removed then the frame for the new door could be fitted, as shown in the picture below.
View into the old workshop, showing the frame for the new doorway. Some of the plumbing for the water treatment plant had now been done.
Picture © Tony Cowling, 2017.
Fitting the door into this new frame was then a comparatively simple job, and the picture below shows it in place.
View into the old workshop, showing the new door in place. The old doors across the track will be replaced by a roller shutter door.
Picture © Tony Cowling, 2017.
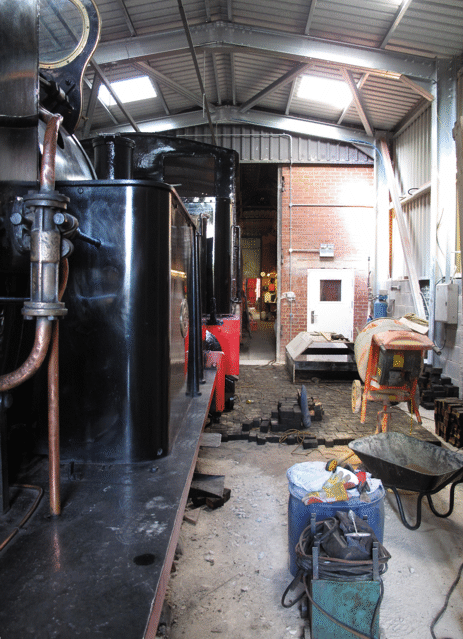
By this point the building was secure enough that we could start to stable locomotives in it, and we could use the pit for washing out boilers. At this stage the building was not yet ready for preparing locomotives for traffic, but other work could be done on them, as shown in the picture below.
Slough Estates No. 3 in the shed in early April, with its smokebox door open ready for some work to be done on it.
Picture © Tony Cowling, 2017.
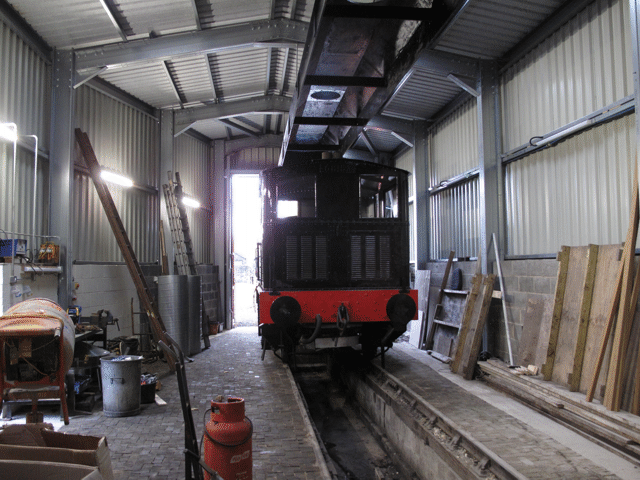
To be able to prepare locomotives for traffic the building would need to have smoke troughs fitted inside the roof, and the construction of these had started, as shown in the two pictures below. As can be seen they are constructed round a timber former, using plywood sections joined together with strips of stainless steel. The plywood is then given a heavy coat of black bitumastic on the inside, and this will enable it to stand the corrosive effects of the smoke better than metal would.
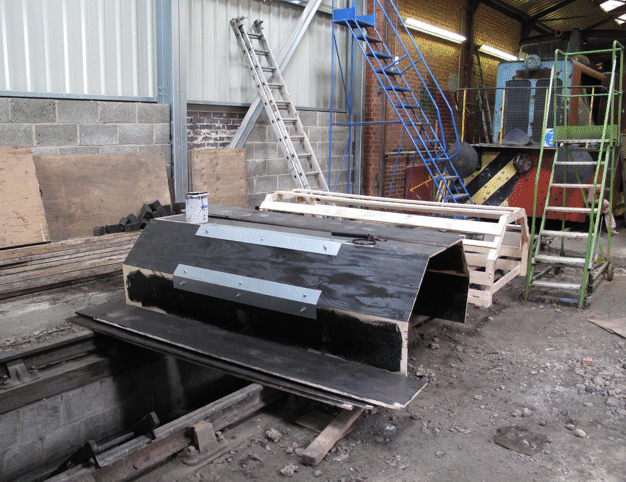
A section of smoke trough being constructed, with the former for shaping the trough behind it. Note that the wooden doors across the track between the running shed and the old workshop had been removed.
Picture © Tony Cowling, 2017.
A section of smoke trough being constructed, with the former standing on its end behind it, and a view behind that into the old workshop.
Picture © Tony Cowling, 2017.
Also, inside the building work had started on laying the wooden blocks for the floor, as enough of them had now been cleaned to enable a worthwhile area to be laid.
A volunteer laying the first few flooring blocks, starting in the north-east corner of the shed.
Picture © Tony Cowling, 2017.
Once the first few blocks had been laid, it became apparent that the concrete needed shaping off to allow the blocks to fit closely against it, and the picture below shows this being done.
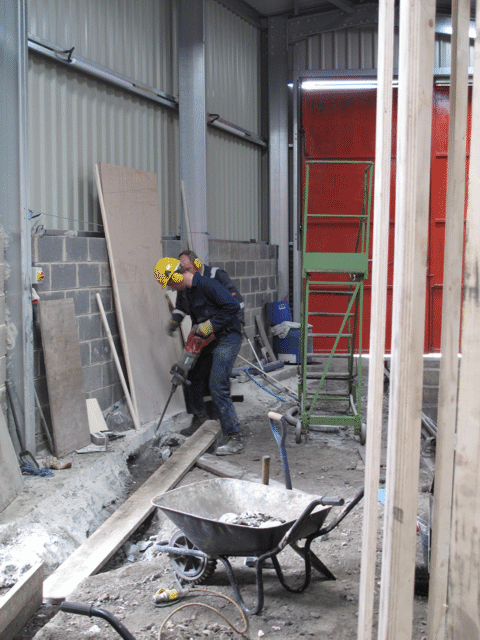
Volunteers working with Kango hammers to shape off the edge of the concrete to allow the blocks to be fitted closely to it. The timber visible in the right of the picture is the former for sections of the smoke trough, standing up on its end.
Picture © Tony Cowling, 2017.
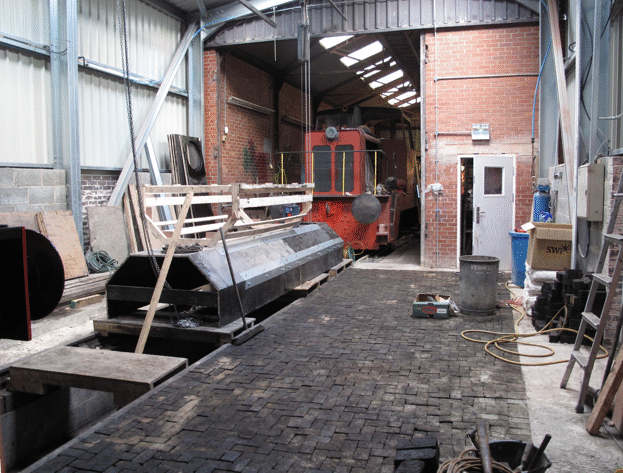
By early July the east side of the blockwork floor was almost complete, as shown in the picture below.
Looking down the length of the shed (containing Sir Berkeley and the Sentinel), and beyond into the workshops.
Picture © Tony Cowling, 2017.
By about the same time, the first complete section of the smoke trough (ie twice the length of the former) was ready to be fitted up into the roof of the shed, and this is shown in the picture below.
One half of the smoke trough, ready to be lifted up and fitted into the roof, with the former upside-down on top of it.
Picture © Tony Cowling, 2017.
Fitting the sections of smoke trough up into the roof was done by a couple of our volunteers who have qualifications in rope access work, but they definitely didn't want an audience when they did it, and so we have no pictures of it being fitted, which was done by the end of July. The picture below, which was take in early September, shows this first half in place, and the second half almost complete. It also shows that the blockwork for the west side of the floor was making good progress.
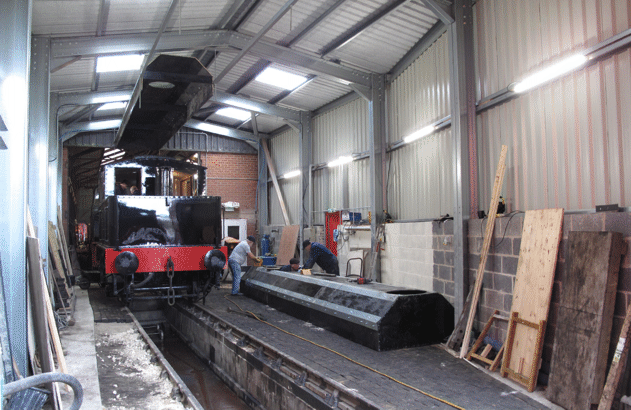
The Sentinel in the shed, underneath the half of the smoke trough that is in place, and with the other half being finished off alongside it.
Picture © Tony Cowling, 2017.
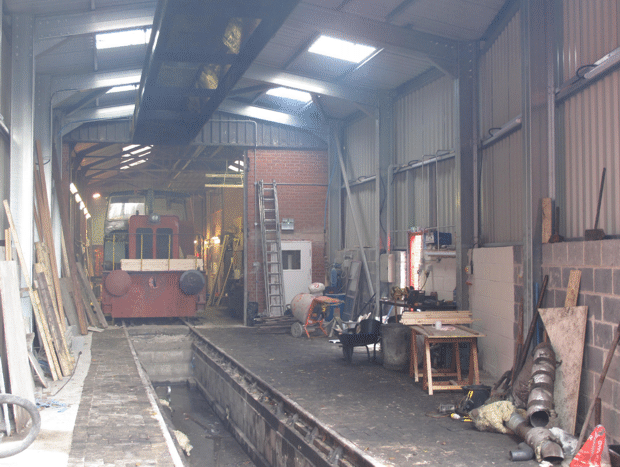
By early November the whole of the smoke trough had been completed, as had all the blockwork for the floor, and we were close to being able to use the shed for its intended purpose.
A view southwards down the running shed, showing the Sentinel, with above it the completed smoke trough and alongside it the completed blockwork floor.
Picture © Tony Cowling, 2017.
Indeed, in December the shed was used for the first time for preparing the locomotives for the Santa special trains, and the picture below shows the shed empty, because the locomotives are out on the train. Even though the weather was relatively kind, this had been a huge improvement on having to prepare them out of doors.
The running shed on the first day when it had been used for preparing locomotives for operation, looking towards the old workshop.
Picture © Tony Cowling, 2017.
Meanwhile, there was still a little more work to do outside, because there had been some errors in engraving the bricks, and this had required a few bricks to be re-engraved, and then fitted in place of the faulty one. The picture below shows a volunteer laying the few replacement bricks.
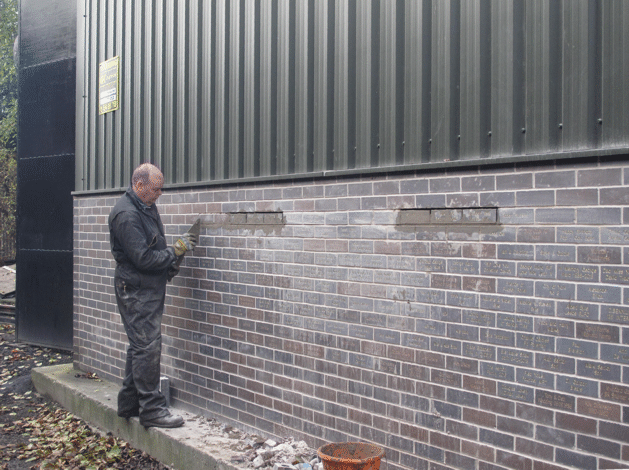
A volunteer laying the bricks that had needed to be re-engraved because of errors in the original engraving.
Picture © Tony Cowling, 2017.
This was not quite the end of the fitting out work, as there were still various odd jobs outstanding, like fitting the roller shutter door between the running shed and the old workshop, but for most practical purposes the project to build a running shed was complete.
Also, somewhere well before this point had been reached, it had been suggested that we should think about organising a formal opening ceremony for the shed, and it had been agreed to do this in order to round off the project.
Go on to the next stage in this project.
Go back to the previous stage in this project.
Return to the overall description of this project.
More Information
Other pages about this project and the "Buy a Brick" appeal:
- An overview of the project and the appeal;
- The "Buy a Brick" appeal;
- The structure of the project;
- The progress with the project;
- The construction of the pit;
- Design and site preparation;
- Construction of the foundations;
- Erection of the framework;
- Construction of the walls and roof;
- The opening ceremony.
Other pages provide more information about: