As described in the page for the structure of the whole project, the Running Shed is being built in seven phases. The first three phases were all concerned with preparation for the actual construction work, and phase 4 was the construction of the foundations. These were completed just before our Victorian Gala on the weekend of 16th and 17th July 2016, and on the Monday morning Midbrook Buildings arrived on site to start erecting the framework of the building.
Monday
The first step was to sort out the uprights for the frames, and which ones would go where, and the picture below shows the various uprights laid out roughly into place on the foundation slabs.
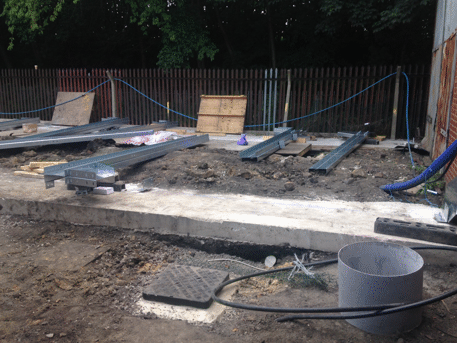
The uprights for the frame laid out in their correct positions on the foundations.
Picture © Mark Calvert, 2016.
Then, after a lot of careful measuring, for each upright holes had to be drilled into the foundation slab, and then a bracket bolted into place on the slab, so that the upright could then be fixed to it. The picture below shows some of these brackets bolted into place, ready for the uprights to be fixed to them.
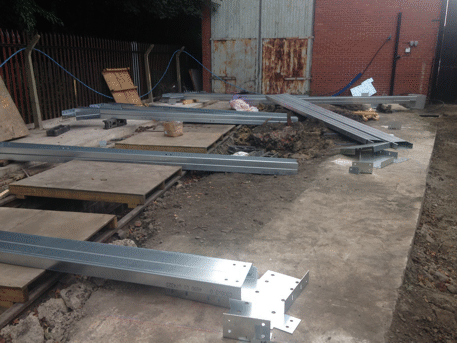
The foundation slab, showing the brackets for fixing some of the uprights for the framework.
Picture © Mark Calvert, 2016.
Tuesday
Work continued on setting out the brackets, drilling the holes for them and bolting them to the foundation slabs.
Wednesday
With all of the brackets fixed into place on the foundation slabs, then erection of the uprights could begin, and the picture below shows the first two uprights being erected.
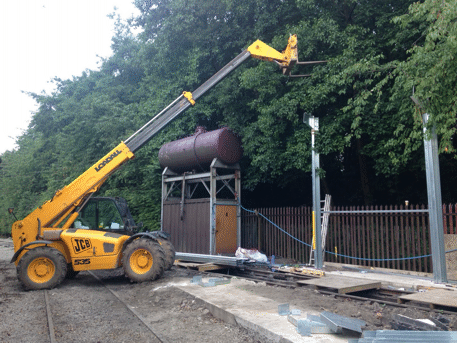
The upright for the south-west corner of the building being erected, alongside another of the uprights for the west wall which is already in place.
Picture © Mark Calvert, 2016.
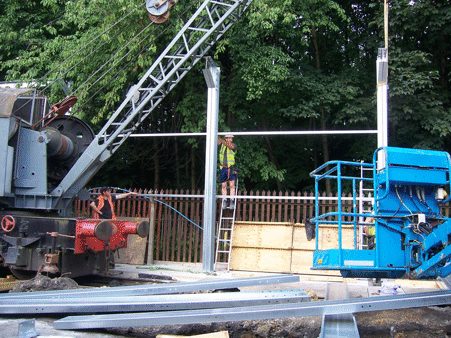
Later on in the day our crane was available to help, and the two pictures below (taken by our crane driver) show a further upright being lifted into place. Only one more to go to complete the west wall!
The sheeting rails are being fixed between this upright and the one to the south of it, to help provide stability to the whole line of uprights. Note the large brackets at the top of each upright, which are to attach the roof rafters. Note also the access platform (cherry-picker), which was not needed for this bit of the job, but was for fixing components higher up.
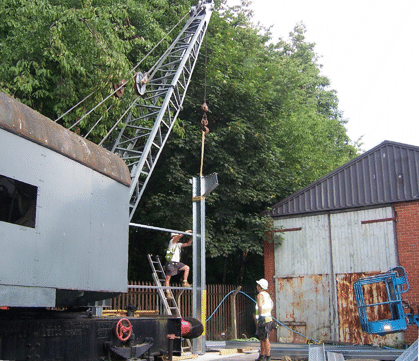
Fixing the sheeting rails to another upright.
Picture © David Hebden, 2016.
Another view of the sheeting rails being attached to the same pair of uprights.
Picture © David Hebden, 2016.
By mid afternoon the whole of the framework for the west wall had been erected, as shown in the picture below. This includes not only the uprights, but also the diagonal braces for the two end bays, which are the main components that provide stability for the whole assembly, along with the sheeting rails and the longitudinal roof girder. Work had started on the framework for the east wall, and the first of the roof rafters was in place.
The west wall framework, with the first of the roof arch girders in place.
Picture © David Hebden, 2016.
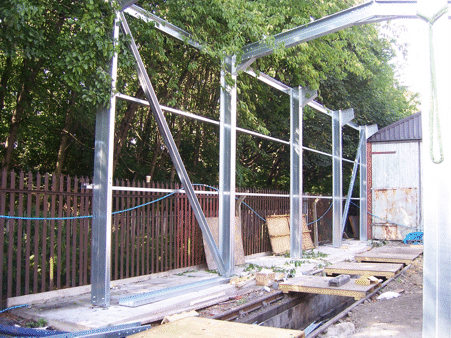
By the end of the day all of the uprights for the east wall had been erected too, and the longitudinal roof girders, as shown in the picture below. The next steps were then to install the rest of the roof rafters, and the diagonal braces and sheeting rails for the east wall.
The framework at the end of Wednesday.
Picture © Mark Calvert, 2016.
Thursday
Work started with the installation of the rest of the roof rafters, and the picture below shows two of them leaning up against the side of the Engine House building, ready to be lifted into place. The brackets on the top edges of the rafters are for attaching the sheeting rails for the roof, which run along the length of the building.
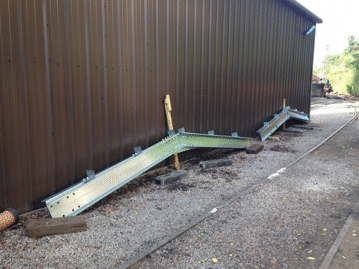
Roof rafters ready for installation.
Picture © Mark Calvert, 2016.
Once the rafters had been fitted, and the sheeting rails for the roof, then the next step was to start fitting the roof sheets. (OK, these are part of the cladding of the building rather than its framework, but that was the order that worked best for the people who were doing the erecting!). The picture below shows some of the roof sheets being fixed into place.
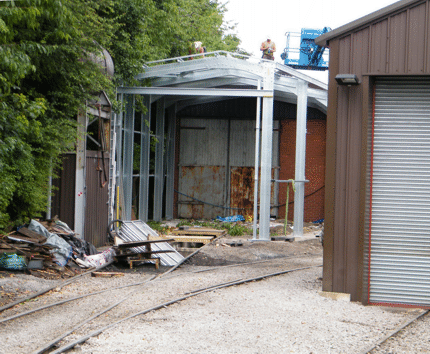
Roof sheets being installed. Note the access platform just visible by the corner of the roof.
Picture © Malcolm Johnson, 2016.
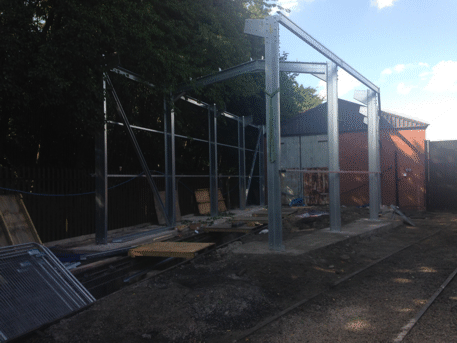
By the end of the afternoon the western half of the roof had been completed, as had the north-eastern quarter of it, just leaving the tapered pieces for the south-eastern quarter to be fitted, as shown in the two pictures below. Also the diagonal braces and most of the sheeting rails for the east wall had been fitted. The gap in the middle two bays had been left because the frame for the emergency exit door still had to be fitted.
Framework and part of the roof, at the end of Thursday.
Picture © Malcolm Johnson, 2016.
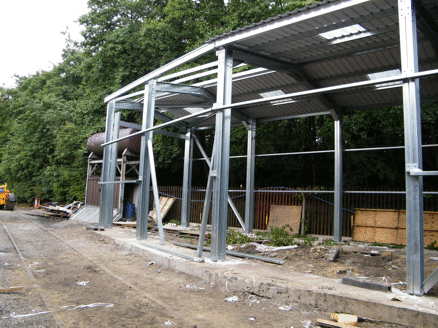
Framework and part of the roof, at the end of Thursday.
Picture © Malcolm Johnson, 2016.
Friday
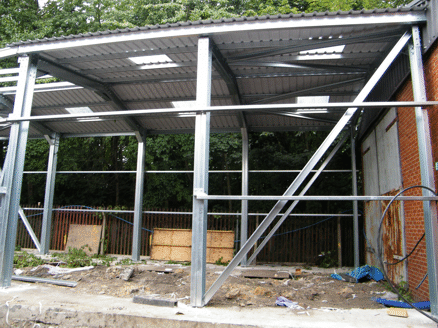
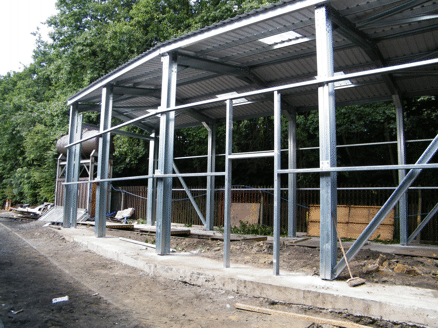
Friday saw the remaining roof sheets fitted, and the remaining sheeting rails for the east wall, including the frame for the emergency exit door, as shown in the two pictures below.
The complete framework and roof, at the end of Friday.
Picture © Malcolm Johnson, 2016.
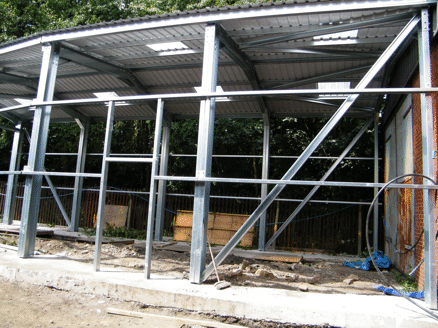
The complete framework and roof, at the end of Friday.
Picture © Malcolm Johnson, 2016.
So now that we had a complete frame with a roof on it, this phase had finished - we had said that we did not expect it to last longer than a week! Then work could start on the next phase, which was to construct the brickwork for the walls, and install the cladding sheets for them above the brickwork.
Go on to the next stage in this project.
Go back to the previous stage in this project.
Return to the overall description of this project.
More Information
Other pages about this project and the "Buy a Brick" appeal:
- An overview of the project and the appeal;
- The "Buy a Brick" appeal;
- The structure of the project;
- The progress with the project;
- The construction of the pit;
- Design and site preparation;
- Construction of the foundations;
- Construction of the walls;
- Fitting out;
- The opening ceremony.
Other pages provide more information about: